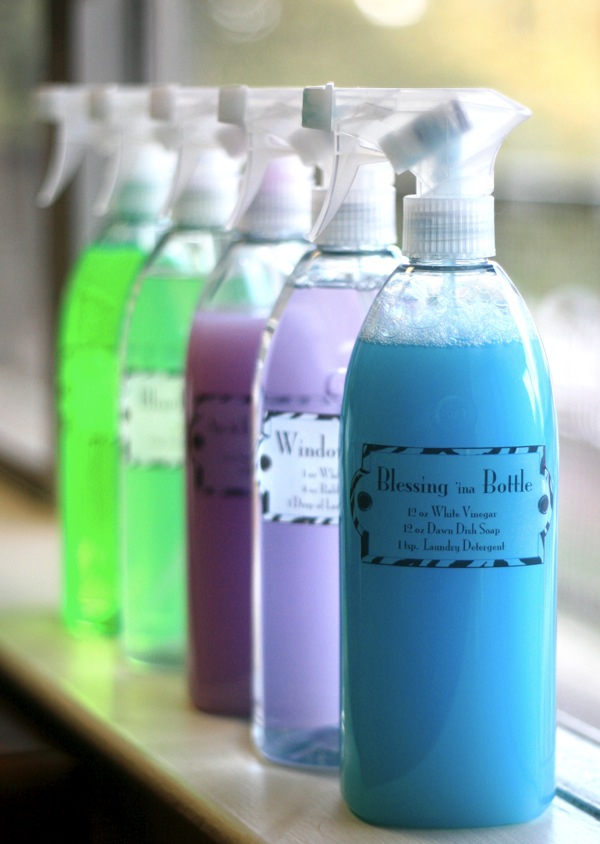
Continuing with our month old series of methods to make non toxic green cleaners with regular items in your own home to help you keep the planet clean and green.
- Homemade Cleaning methods for Cast-Iron Cookware.
Compared to the widely used Teflon cookware, Cast-Iron cookware might be heavy, but they are durable and can last for generations.
Well that was the good bit about cast iron cookware, but it also has a downside too. Like how our beloved cast iron cookware demands unconditional love and care from us. It needs to be seasoned and protected from rust and what not.
So without any further adieu let us get on with it now shall we.
Fats and oils are mostly used to season cast iron. Our grandmothers usually recommended using rendered lard and tallow but now-a-days flaxseed and soy bean are considered to be a wonderful and at times the best alternatives.
You can always use Coconut oil as well, since it is such a healthier alternative but we do have a few other methods for you as well.
Seasoning Cast Iron Cookware
Now there are is a single method that we have on our hands but it comes with a couple of preparatory options that you can use to tackle this little bugger of a situation, so have a look.
The Preparation:
Optional Step #1: If the cookware you have bought has come pre-seasoned, then you better take a look at the type of oil that went into the process of seasoning. The one mostly used in such situations is GMO soybean oil. If you do not like the idea of your cookware being pre-seasoned then have a look below at the methods of what to do when cast-iron cookware is rusted and use it to get rid of the said oil.
Optional Step #2: If your pan is slightly brownish consider bake it at 400-450F for atleast an hour or more prior to seasoning it.
This method is believed to help develop a layer of magnetite on the surface. Magnetite is an iron oxide which is seemingly thought to be protective against corrosion.
Overtime, cooking of different items on high heat on the cookware will make the cookware transition from brown to black.
The Method:
- Rub cocnut oil or any other fat like tallow or lard on the inside and outside of the pan in question using a paper towel.
- Make sure to rub it thoroughly into every single nook and cranny.
- Then take another paper towel and wipe the pan until it looks completely dry.
- Place pan upside down in a cold oven. Although there shouldn’t be any drips, but just to be safe use a baking sheet or piece of foil to be place beneath it to catch any errand drips.
- Turn the oven on to 400 – 450F.
- When it reaches the desired temperature, set a timer for 1 hour and allow it to bake.
- When the hour is complete, turn off the oven but do not under any circumstances open the door.
- Allow the pan to cool for a couple of hours before removing.
Congratulations on seasoning your first ever cast iron pan .
Even after going through all this if you still feel as if the pan is still sort of sticking, repeat the process several more times. Add as many cycles as needed.
For further care use as many healthy fats as you can while cooking, since they help with the seasoning.
Cleaning Cast Iron Cookware
As you already know, or if you don’t then we are here to tell you, that you should never soak cast iron cookware along with any cleaning agent like soap or detergent as if may strip the surface or the said cookware.
The best way to clean it would be to use a stiff bristled brush along with some searing hot water and voila! There you have it, a freshly cleaned cast iron pan.
Removing Rust from Cast Iron Cookware
Cast iron is vulnerable to oxidation if not properly seasoned and activities like boiling water and cooking acidic foods like tomato can aid the oxidation process.
So, here is how to remove rust and restore the protective finish of cast iron cookware.
What to use…
- Potato
- Baking soda or salt
- Coconut oil
The Method:
- Cut the potato in half.
- Dip the cut in baking soda.
- Rub over rusted surface.
- If the end of the potato becomes slippery to touch, cut it off at the tip and then re-dip in baking soda.
- Repeat until rust is completely removed.
- At last, immediately re-season the pan with coconut oil to prevent oxidation.
- Homemade Laundry Spot Remover.
I have a problem. I am obsessively compulsive when it comes to cleaning and this habit of mine has not even spared my laundry habits. I never mix the lights with the darks and have always used good quality detergents. But ever since my tiny little one has turned into a fresh preschooler I have an additional task to deal with – Messy Spots!
Taking this problem in a stride I wiped up my very own cleaning method in a jiffy. Here is it for your aid as well.
What do you need:
- Glass/Plastic spray bottle
- 1 & a half cup of water
- Quarter cup liquid vegetable glycerine
- Quarter cup liquid castile soap
- 5-10 drops of lemon essential oil
Instructions:
- Mix all ingredients together.
- Store the mixture in a glass container if you are using an essential oil because lemon can disintegrate plastics.
If you are not doing to use any essential oil, the mix can then be stored in a plastic bottle with spray nozzle up top.
- Shake well before use and apply it liberally to spots and stains.
- Lightly rub the mixture into the fabric with your fingertips.
- You’d get the best results in you let the fabric soak in water before tossing it into the washing machine.
Soaking overnight would yield way better results.
Notes:
- If you are worried about discolouring the fabric in question, then test it first in an inconspicuous are before applying it to the spotted area.
- Try to work the spot immediately or otherwise you might not get good results.
- If you don’t have liquid castile soap, you can use liquid dish soap instead
- DIY Homemade Laundry Stain Stick.
A laundry stick is the perfect way to pre-treat stains on the go, specially the stubborn ones like tea, coffee, lipstick, chocolate and wine.
Plus it is very easy to use as well, simply swipe it on and then toss the fabric in the washing machine to remove the stains.
What You’ll Need:
- Quarter cup shredded castile soap bar
- One-Third cup shredded Fels-Naptha soap bar
- 1 tbsp vinegar
- 1 tbsp washing soda
- 2 tbsp water
- Mixing spoon
- Small saucepan
- Grater
- Lip gloss or mini deodorant containers
- Scissors
- Plastic bag
Directions:
- Shred and measure the Fels-Naptha and Castile soaps.
- Add to a small saucepan.
- Measure and add the washing soda, vinegar, and water.
- Stir over low heat until the mixture melts together and has a pudding texture.
- Turn off heat, and let cool for five minutes.
- Clean and dry the lip gloss or deodorant containers.
- While the stain stick mixture is still warm, spoon it into a plastic bag, and squeeze it into one corner.
- Snip the edge, and pipe into the lip gloss or deodorant container, tapping on your work surface to pack the stain stick into the small holders.
- Finish the tops by gently rubbing against the palm of your hand.
- Once the stick has cooled, top with the cap, and it’s ready to smooth on unwanted stains!
- DIY Homemade Crayon Remover.
When it comes to a house filled with crayon loving teeny tots, seeing them create master pieces on the walls and random furniture is the greatest of worries mothers have to face. Now there is a really easy way to get rid to them. Read on to find out.
What you’ll need:
- Lemon essential oil.
- A soft cloth or rag.
Directions:
- Apply a few drops of essential oil to the rag or cloth.
- Scrub the place with crayon marks with the said cloth.
- Clean the area when done with a damp rag.
There you have it… All Done!
- DIY Homemade Citrus Enzyme Cleaner.
Although bleaching clothes cleans them very easily, but using an enzyme based cleaner on them would make them even cleaner. Why? Because enzyme based cleaners can get rid of stains left by bodily fluids, like those pesky under arm stains.
Now the best news of all. Enzyme based cleaners can clean anything. And when I say anything I mean ANYTHING!
And, citrus enzyme cleaners is great because it’s:
- Natural
2. Cheap since you are using up kitchen scraps
3. Effective
4. Easy to make
You can make it at home too… But it takes at least three months for the lemons to ferment. But still, it is a small price to pay for something so damn great.
What You’ll Need:
- 2 Litre Wide Mouth Bottle 2 C or Enough citrus fruit peels to fit half the bottle. Oranges, Lemons, Lime,
- 1 Litre of water
- 1 Tsp of active yeast
- 1 C Apple Cider Vinegar
- 1/2 C Brown Sugar (or white sugar)
- Strainer or cheese cloth
- Funnel – to add brown sugar
Directions:
- Pick a bottle that has a wide mouth and make sure to follow the proportions in this recipe.
Do NOT double the recipe in this bottle.
- Take the scraps of citrus fruits like lemons, limes and oranges and chop them up into tiny pieces.
- Make sure that the pieces are small enough to be able to shoved through the opening of the bottle.
- Add water, sugar, yeast, and shake for about 30 seconds.
- Then, close the cap LOOSELY so the trapped air can escape and not build up in the bottle.
You’ll see the foam on the top in a day or two because of yeast fermentation.
- Shake the bottle daily for the first few days to mix the yeast and let out the air.
- After about 2 weeks, the enzyme will look opaque. Strain the pulp and the peel.
- Add apple cider vinegar to the liquid and store the liquid in a glass jar.
You can create an all-purpose cleaner spray bottle with 1:10 ratio to water and clean away to your heart’s content!
Or, you can use the concentration amounts that are appropriate for other cleaning uses.
So there you have it folks.
You can clean anything and everything in your house as long as you use our fore-mentioned tips, but if you can’t you always have the most reliable cleaners in London City (United Kingdom) to help you guys out.